Pages

mardi 29 octobre 2013

Miami Beach


 Helloooo!
Un petit nail art que j'ai fait dimanche, vite fait, qui reprend la technique du dégradé à l'éponge (oui, je l'aime bien ^^), combinée avec celle du dessin à l'eye liner. Cette fois-ci, j'ai investi dans un Feutre liner, et le Kiko change ma vie! Il est très fin, et très précis car rigide. Cependant, comme tout feutre, la pointe s'effrite petit à petit, mais il reste pratique.

A little nail art I did on sunday, quickly, which use the spong gradation technique (yeah, I really like it ^^), with the one of the eye liner. This time, I use a felt-tip, and the Kiko's one changed my life! Really skinny, with precision because it's rigid. But, like everye felt-tip, the end crumbles off little by little, but it still useful.

Outline :

Model : Magda


Hop, un petit dégradé pour le coucher de soleil, deux petits palmiers, et quelques oiseaux par-ci par-là à contre-jour.

Hup, a little gradation for the sunset, two little palm trees, and some birds here and there, against the light.


 Nail polish used :

 Rouge fluo Fashion Make Up       -       Jaune fluo Fashion Make Up
 Orange fluo Fashion Make Up

 Feutre Liner Kiko             -              Rosy Future O.P.I


Voici la pointe du feutre liner, pour montrer sa finesse :
Here the head of the liner, to show its sharpness :


Et encore un tutoriel gif, j'avoue qu'ils sont assez pratiques ^^ Pardon pour ce dégradé hideux, mais je ne maîtrise pas encore bien le format gif.

Again, a gif tutorial, they're quite useful ^^ Sorry for this ugly gradation, but I'm not so used of gif.

Thank you!


lundi 28 octobre 2013

Waves

Bonjour à tous!
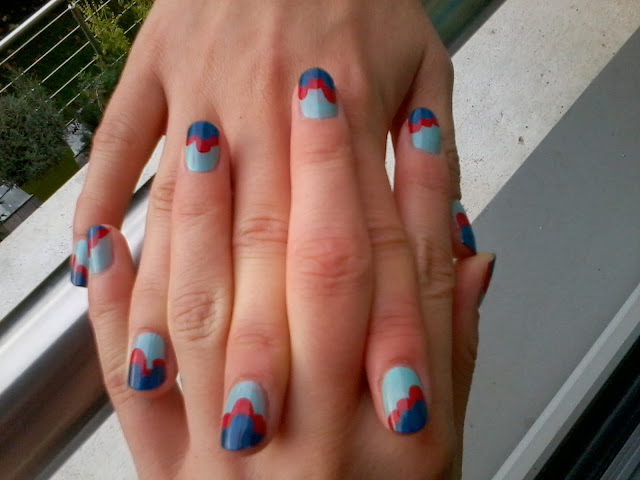
Cet article va être très rapide, puisque ce nail art m'a été inspiré par internet, j'ai vu ce tuto quelque part, il est extrêmement simple puisque c'est une superposition de trois couleurs. J'ai même pris la peine de vous faire un petit tuto gif. Par contre, vous m'excuserez pour la qualité médiocre de mes photos, je n'avais pas mon appareil, j'ai donc été forcée de prendre les photos avec mon téléphone.

Hi,
I will be quick, because I found this nail art on the internet, I saw the tutorial somewhere, it's really easy because you just put three coloured nail polish. I made you a little gif tutorial. I'm sorry for the photos, but I didn't have my camera, so I took the photos with my phone.

Ouline :

Model : Amaia

Nail polish used :


Hot in here


Green tea time
Shark attack


 Et comme promis, le tutoriel :

Pour les bouts ronds, vous avez deviné, il suffit simplement de les réaliser directement avec le pinceau du vernis ;)
The round ends, you just have to do them with the nail polish brush ;)


samedi 12 octobre 2013

Ethnic nail art

Bonjour!
Voilà voilà, le beau temps est parti, il fait froid, le ciel est gris, c'est tout triste, bouuuh.
C'est pourquoi je débarque après une absence d'une durée certaine, n'est-ce pas, avec un nail art ethnique inspiré par Pshiiit, certes un peu moins nickel, mais je n'ai pas vraiment le matériel.

That's it, bad weather, cold, grey sky, sad, automn.
So I come back with an Ethnic Nail Art inspired by Pshiiit, maybe not really the same, but I don't have the rigth stuff.

Outline :

On voit tout mes coups de pinceaux, oui, je sais, mais quand on a pas de Top Coat, on fait avec. J'ai utilisé trois vernis différents, et... Un pinceau aquarellum! Vous savez, ces boîtes d'aquarelle qu'on a quand on est petit :P Vu que je ne savais pas trop comment m'y prendre, j'ai fait un peu au feeling, à la one again. A la main quoi.

You can see all the track of brush, I know, but when we don't have Top Coat... I use three different Nail Polish, and... An Aquarellum brush! You know, this watercolor box we have when we're young :P I didn't really know how to do this Nail Art, so I did it quite basically... Hand made.

Nail polish :